Additional Activities to Develop Sentence Skills
Labeling and Requesting are the most basic of all full sentence activities, and provide a basis for your student to understand that communication requires more than single word utterances. The following list of activities offers just a few examples of the many lessons you can use to help build full sentences and a more complete system of communication with your child.
Adjectives
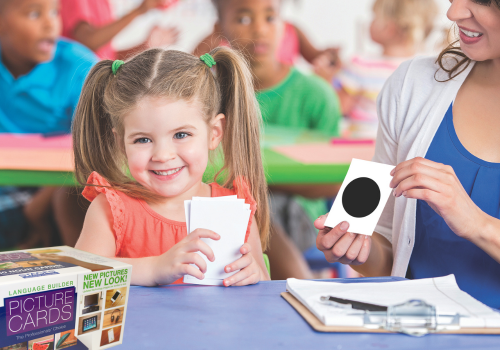
You can use picture cards to discuss adjectives or descriptive words. Some adjectives are clear from the pictures, such as "the apple is round" or "the frog is green". Other adjectives draw more on a child's real-world experience, like "the bunny is soft" or "the banana is sweet". To teach adjectives, you can start with a receptive task. Place cards in front of your child and ask them to "find something green" or "point to something that is round". This receptive language activity will allow your student to hear some of the adjectives you use, before trying to come up with their own descriptive words when you start to build sentences with them.
To transition this activity to expressive language, you can hold up a picture and ask your student, "What color is the frog?" You will need to prompt your student at first either verbally or using a cue card method as described above.
Wh- questions
Picture cards provide a great opportunity to practice "Wh" questions. You can show your student a picture and ask him or her to answer questions such as "What color is the frog?" "Where would you find a plate?" "When do you use a pillow?" "Why do you use soap?"
To start, some of these questions will fall easily out of the adjectives lessons you have already practiced, such as "What color is it?". Other questions will provide a new challenge for your student.

Tell me about
Use pictures with which your student is already familiar. The best pictures will be the ones you have practiced extensively on the Adjectives and Wh Questions activities. Show your student a picture and ask him or her to tell you about the item in the picture. The first things that your student should be able to tell you about the pictures are the responses that they learned in Adjectives and Wh Questions lessons. The difference with this drill is that your student has to generate the content themselves rather than respond to your question. When you ask your student "What color is it?" they know color is the relevant detail. In the Tell Me About lesson, students have to decide for themselves that color is a relevant thing to tell you about the picture.
You can start with scripted responses, using the picture to cue your student. Then you can progress to more creative responses that might not be so obvious from the picture. For example, show your student a picture of a duck. Ask your student, "Can you tell me about a duck?" By looking at the picture, your student can get some basic answers. "A Duck has feathers." "A duck has webbed feet." "A duck has a bill." As your student becomes more familiar with this activity, you may progress to things about a duck that are not readily apparent from the picture. "A duck can swim.", "A duck says quack quack", "A duck lays eggs."The Tell Me About lesson also gives you the opportunity to increase the length of your student's verbal activity. Start by requiring the student to tell you only one detail about the picture. Then move up to two, or three or more details. Of course, if you ask your student to tell you three things about the picture, you may have difficulty if they haven't mastered counting skills. Here's a trick: hand your student three blocks and have them toss a block into a bucket with every detail they tell you. This is a great way to help your student count their answers, and it makes it fun for them!
Storytelling
The next step in this language building series is Storytelling. Again, this activity builds on the previous lessons. Show your student a familiar picture card and ask your student to "Tell you a story" about the picture. The first elements of the story will likely be familiar from the Tell Me Aboutlesson. For example:
"Tell me a story about a duck."
"There was a duck, it had webbed feet, feathers, and a bill. The duck went for a swim in the pond, then it laid some eggs and said "quack quack".
As your student's language skills grow, so will the creativity of the stories!
Generalization
The setting in which you begin to teach language skills is very structured and formal. However these new skills will become more valuable as they generalize across time and setting, and with various communication partners. To help promote generalization, you can start by moving your therapy session to different places, starting even with different rooms in the house.
Next, it is important that the skills your child has learned in the formal therapy session be practiced throughout other aspects of the child's life, such as during family time and at school. Make sure to bring the cards (or have second sets) to dinner, to the store, to school, etc. Whenever you communicate with your child, require the same full sentences that are expected during therapy. Stop and take the time to use the prompt cards if necessary.
Finally, keep good records and good communication channels open with all of the other professionals and family members in your child's life. You should send a notebook back and forth to school, or perhaps start an electronic communication log to make sure teachers are requiring the same sentences, using the same words, and bringing in the same prompts as you are at home and in therapy. Consistency is a major key to building and generalizing successful language skills to help your child interact with the world around them.
Part 1: Encouraging Emerging Language and Receptive Vocabulary
Part 3: From Basic Vocabulary to Building Sentences
Try the activities outlined here with a free sample of our Language Builder Picture Cards!