
 I truly hope that the downloadable Language Builder ARIS lessons have been helpful as you endeavor to set up your child's at-home education program.
In 2020, we made available 34 downloadable lessons from our Language Builder ARIS curriculum. We worked hard to include a variety of activities across the widest range of content possible. We gave you a sampling of picture cards to support the lessons, and guidance on how to build a rich library of materials to expand your child's learning experience. As promised we will continue to provide tips and support, and add more free resources as quickly as we can get them adapted. 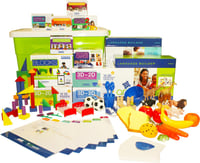
Learn more about the ARIS Curriculum here! 
The following is a list of lesson-specific tips to help you successfully implement the materials we have provided thus far, as well as a brief description of how to adapt some of the lessons to cover a wider range of content. In the coming days, we will also be opening up our Autism Learning Line, an online venue for parents and educators to share experiences and to offer each other support and ideas.
Approaches to Learning
Attention & Imitation
Lesson 7 - Waiting
This is a great place to start. Even if your child can successfully use their waiting skills at school they may need extra practice do so at home, particularly given their recent change in routine. Start off small... maybe 2-3 seconds... then gradually work up to a couple minutes.
Lesson 8 - Non-Verbal Imitation
This can be a fun one! It is an important skill for children to learn, as imitation provides the foundation for learning bigger skills. You can play “do this” and use simple or silly actions. Its a great way to engage your child and may also help you both get some energy out.
Lesson 9 Verbal Imitation
This can can also be a fun and silly game. Verbal imitation is a critical first-step for building language skills. Make a game out of it using by using silly nonsense sounds and have your child repeat the sounds and make their own for you to repeat.
Following Directions
Lesson 10 - Following Single Verb Commands
This is the next step after non-verbal imitation. Think of “Simon Says” as an example. Give simple one step directions that your child can imitate such as “clap your hands” or “touch your head”. Start with the actions that your child does well with in the non-verbal imitation.
Matching
Lesson 12 - 3D to 3D Matching
This is the first step in teaching matching. Try to find objects your child knows and can easily handle. You can grab toy cars out of the playroom or spoons or any other everyday object you have two of. A really good place to start with this activity is with items that "nest" such as bowls, cups or spoons. For more ideas on finding materials for this and the rest of the matching lessons, visit our article on Do-it-Yourself Materials for ABA Based Lessons.
Lesson 13 - 3D to 2D Matching
Once your child can match the physical objects, the next step is matching the object to a picture of the object. You can take pictures of the items you used for the 3D to 3D matching to use with this lesson. If you want to make it more advanced, you can take pictures of areas or items around the house and have your child find them and match them.
Lesson 14 - Identical Matching of Common Objects Photos
Print a second copy of the pictures you used in the 3D to 2D matching exercise to start. Then, you can print duplicates of the picture cards that are provided with this Emergency Resource Kit.
Lesson 16 - Similar Matching of Common Objects
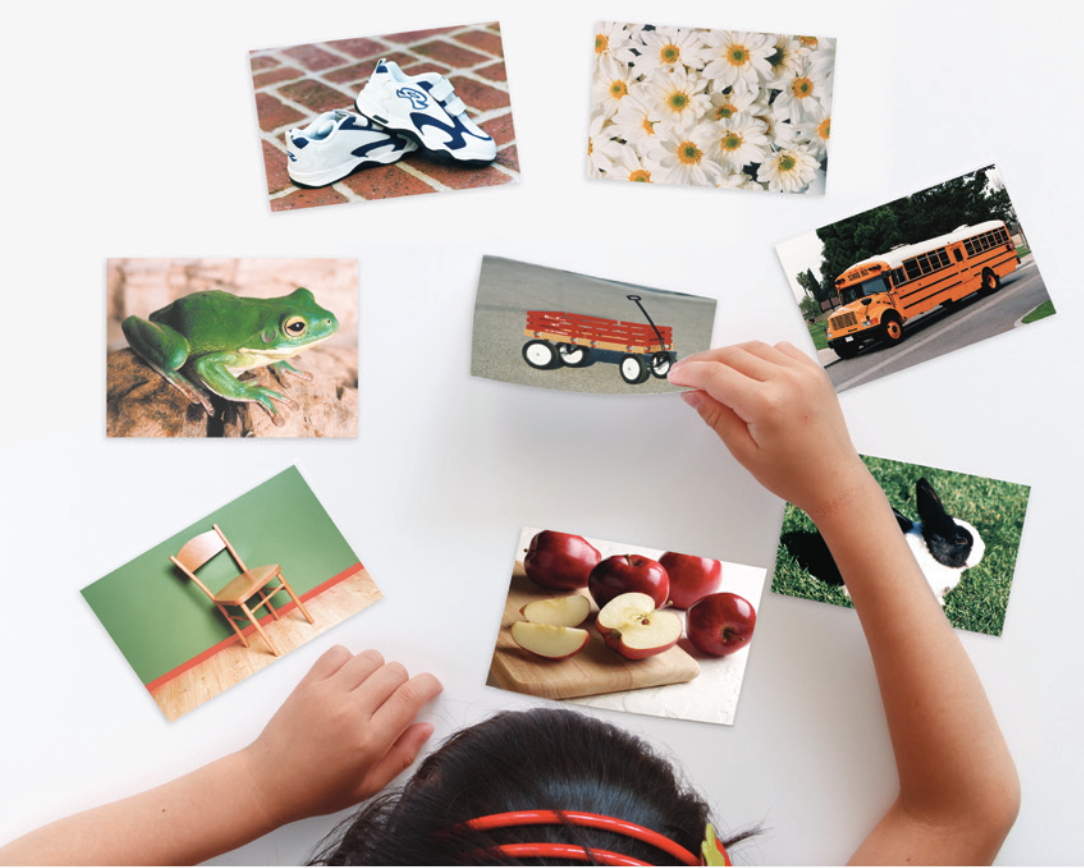
When your child is able to match identical objects have them match non-identical objects such as toy cars that are not the same, a plastic spoon with a metal spoon, different shoes etc. The last 6 pictures that we included in your free Language Builder Cards download are of 6 different cats. This is an example of what we mean by "similar images." Following the advice offered in the article Do-it-Yourself Materials for ABA Based Lessons, you can either take your own pictures or go to one of the suggested stock photography sites to find similar pictures of other things like chairs, spoons, apples, birds, beds, flowers, bikes, cars, etc.
Sorting & Classifying
Lesson 96 - Sorting by Category
Start small with items your child knows and finds interesting such as toys or clothing and have them sort these items into categories. A few common categories include: animals, foods, vehicles, clothing, or toys. Start with broad categories like these, then when your child starts to understand the concept, you can refine the categories to things like fruits v. meats, cars v. airplanes, etc.
Understanding Concepts of Time
Lesson 100 - First, Next, Last Sequencing Cards
Concepts of time help children feel a sense of agency and predictability about their environment and their schedule. We often start with “first-then”. For example: “First we are going to clean up and then we can go outside”. When you have introduced this lesson in a formal setting, you can continue to reinforce the idea of First, Then, Next, Last throughout the day. You may actually find a reduction in negative behavior.
Recall & Recital
Lesson 103 - What did you do? Immediate Recall of Single Action
This is the next step in teaching time and its relation to activities. This can be taught in the moment following an activity by asking your child, “What did we just do?”. Keep it simple and immediate. As your child starts to get the idea, you can increase the amount of time between an activity and asking them what they did. Ultimately, we want to work toward a typical conversation such as "What did you do at school today?" "We went on a field trip."
Language
Receptive Language
Lesson 17 - Receptive Language: Body Parts
An example of Receptive Language is when a child can identify the word or label by pointing to it. Your child "receives" the language you have spoken, then acts in a way to let you they understand. For this lesson, you can have your child point to body parts they know. You can make this into a silly game by seeing how fast they can go or playing “head, shoulders knees and toes”. Keep it to larger body parts to start e.g.: head, arm, leg and move on to smaller ones like fingers, toes, ears, etc.
As described above, we have carefully selected lessons that can easily be adapted to cover a wider range of content. Following the receptive language phase that uses pictures, as described on the full ARIS lesson, you can substitute a wide variety of content for a good deal more receptive vocabulary building. Using the free downloadable images we have provided, along with the material you have assembled, you can adapt this lesson to teach Receptive Noun Labeling, Receptive Identification of Familiar People, Receptive Verbs, Receptive Colors, Receptive Shapes, Receptive Identification of Occupations & Community Helpers, and Receptive Identification in Books and the Environment.
Expressive Language
Lesson 27 - Expressive Labeling - Single Nouns
Expressive Labeling is when a child can tell you the name of an item when you ask them "what is this?" You can have them label toys, items around the house, or things in your yard. Stick to items your child is interested in to keep them tuned in.
Again, we selected this lesson because it can easily be adapted to cover a wider range of content. You can substitute different photos and objects to teach Expressive Body Parts, Expressive Identification of Familiar People, Expressive Verbs, Expressive Colors, Expressive Shapes, Expressive Identification of Occupations & Community Helpers, and Expressive Identification in Books and the Environment.
Parts of Speech
Lesson 36 - Identifying Prepositions
Start this one off by having your child move an object to a position in relation to something else. For example: “put the car on top of the plate”. You can move on to make this a more active game and have them move to different positions. For example: “Stand in front of the couch”.
Intraverbals
Lesson 42 - Yes/No Answers
Intraverbals are the types of language where your your child responds appropriately with words to something you say to them, as in a typical conversation. Intraverbal behavior can be tough to learn for some kids... especially if they tend to be echolaic, which is when they repeat noises and phrases that they hear. Someone with echolalia might only be able to repeat a question rather than answer it.
As frustrating as it may sometimes be, echolalia is actually a natural part of language development. Consider a toddler repeating words they hear (and not always the words you want them to repeat!). Rather than try to prevent it completely, you may be able to use it to build communication.
In this lesson, Yes/No Answers, you may say to your child "is it an apple?" Instead of answering "Yes," they respond by repeating the question "Is it an apple?" You can start by asking the question more quietly, then modeling the answer more loudly for your child to echo: "Is this an apple? --- Yes." Your child repeats "Yes." Slowly increase the volume of your question and decrease the volume of your prompted response:
"Is this an apple? --- Yes."
"Is this an apple? --- Yes."
"Is this an apple? --- Yes."
"Is this an apple? --- Yes."
Continue like this until your child can answer the question without the prompt.
Motor Skills
Fine Motor
Lesson 48 - Tracing Lines
We included several fine motor drawing, tracing and coloring lessons, and gave you the activity sheets to go along with them. The activity sheets for lessons 48, 49, 51, and 52 are in the back of the abbreviated instruction guide we provided with your free resource kit. You can also, simply, draw straight lines, curvy lines and zigzag lines for your child to trace. Keep the lines simple to start if your child is just starting to use pencils or crayons. You can also use thicker paper or index cards to make the paper easier to hold. Alternatively, you can do these activities on a dry erase or chalk board.
Lesson 49 - Shape Tracing
As with the Tracing Lines activity, we included several activity sheets to go along with this lesson, which are in the back of the abbreviated instruction guide in your free resource kit. Shape tracing is simply an extension of the line tracing activity. In ABA, we break down actions into very small components. This is a great example of this strategy: first learn to draw a line, then a shape, then a picture, etc. Don't worry too much about proper tripod grasp at this point. You can use Shaping to help develop this skill a little at a time. There is a great section on Shaping in the ABA Basics Section of the abbreviated instruction guide.
Lesson 51 - Coloring Within Lines
You can add this lesson on to the shapes your child traced in Lesson 49. Just have them color the shapes in. Focus on having your child try to “fill the space” and make broad strokes with the crayon or markers. Or, you can use the activity sheets we provided in the abbreviated instruction guide.
Lesson 52 - Tracing Simple Pictures and Dot-to-Dot
We provided activity sheets for this lesson in the abbreviated instruction guide. You can also find easy dot-to-dot activity sheets online of your child’s favorite character for them to start with.
Lesson 53 - Stacking Blocks
This activity is about the fine motor skill of grasping and stacking blocks. It is not about creative play. Lesson 63 focuses on the skill of playing with blocks. For this activity, you can use any blocks: large wooden blocks, foam, or interlocking blocks. Use whatever your child can easily handle, is interested in, and you have on hand.
Lesson 57 - Stringing Beads
You can start with large wooden beads and move on to using smaller plastic beads like those used to make kids' bracelets or necklaces. If a string is too difficult for your child to handle, you can try using pipe cleaners which are sturdier and may be easier for your child to manipulate.
Gross Motor
Lesson 59 - Bouncing
Ball play helps children develop both coordination and muscle skills. Obviously, this is an activity that might not be suitable for the home environment when the weather prohibits you from going outside. If available, a garage space or a covered patio may provide a good alternative.
Social Emotional
Independent Play & Work
Lesson 63 - Block Imitation - Basic Structures
Use any blocks you have on hand. Keep it simple, by using two or three blocks to start. As your child improves the ability to replicate your structure, you can move on to more creative designs like houses or animals. We have a free Language Builder: Blocks App that you can use to make this activity even more fun. The app offers pictures that go specifically with our Language Builder Block imitation product, but you don't need to have our specific blocks to use the app. The app allows you to take pictures of your own block structures and add them to the library. Then, if you want, you can use the timer-feature to time how long it takes your child to build the structure. The kids have fun trying to beat their best time! This can be a fun activity for your child to share with their siblings. The app is available for iPad or iPhone. I apologize it is not available on android or other platforms at this time.
Emotional Health & Well-being
Lesson 65 - Matching 5 Basic Emotions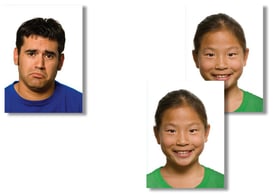
Use pictures to start for early learners. Using identical pictures is usually the easiest, moving on to non-identical pictures. Among the pictures we provided in your free Language Builder: Emotions Cards download are 2 happy cards and 2 sad cards. You can print 2 identical copies of each of these and start by having your child match the identical happy pictures when presented with those two pictures and a sad picture, and then the identical sad pictures against a happy picture.

When your child is able to match the identical happy pictures, you can ask them to match 2 different happy pictures, so they start to understand how to recognize the way a happy face looks. Then, you can follow the same process using the sad pictures. To expand upon this activity, take pictures of family members or friends making each of the faces (happy, sad, angry, scared, disgusted). Make sure to ask your model to wear a solid color shirt and to stand against a white background, so the pictures are similar to the ones we have provided.
This document is a work in progress. We will continue to update it through tomorrow (3-26-20) until we have tips for all of the lessons, but I didn't want to wait to publish, as I know you all can use as much information as possible.
We are committed to providing as many free resources as possible to families, and we will add more links daily. We have received numerous requests from families who still want to purchase the physical curriculum and have asked for a discount. Accordingly, we are offering a 20% discount code COVIDDISCOUNT for anyone who wants to purchase the Full ARIS Curriculum or any of the Language Builder products and we will provide free shipping on the curriculum. Please know this is not a sales attempt. We are responding to requests, and trying to help in every way possible.
Related links:
Coronavirus: A Glossary of Terms to Help You Understand the Crisis